surveydown::sd_db_config()Storing Data
Survey response data is stored in a PostgreSQL database. We recommend using Supabase as a free and open-source option, though you can use any service you want. In this guide, we’ll walk you through the steps for setting up a Supabase project and connecting your surveydown survey to it.
Tip
Rather not do this by hand? The surveydown agentic skill can walk through this whole process for you: creating a Supabase project, storing your credentials, and switching the survey to mode: database. See Connect a database.
Survey modes
surveydown supports three operating modes — database, preview, and local — controlled by the mode setting in your survey.qmd YAML header. These modes determine how and where your response data is stored. See the Survey Settings page for full documentation on each mode.
In short: set mode: preview while building your survey, which stores data locally, then remove it (or set it to database) before deploying to store in a database, or set it to local to run the survey on a single computer and store data locally.
Setting up a Supabase project
First, navigate to the Supabase website and create an account.
Once you are logged in, the page will prompt you to create a project (it’s a green button). Click on it and select your organization. A dialog box will pop up like this:

Fill in the project name and give it a strong password. Choose a region that is close to you (or close to your survey audience). All settings can be modified at any time.
Note
Each Supabase project is a database that can store multiple tables. Since each surveydown survey requires only one table, you can use the same Supabase project for multiple surveydown surveys.
Getting your Supabase credentials
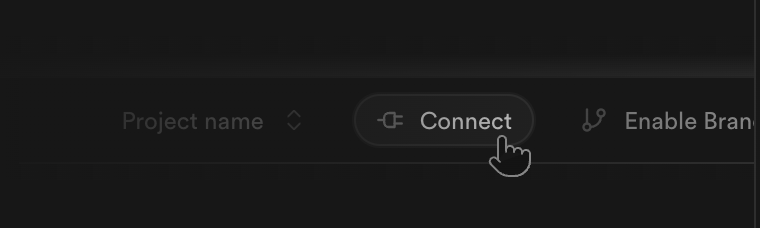
Once your Supabase project is ready, click on the “connect” button at the top, it should look like this:
On the connection page, click the “Direct” connection option, then select “Transaction pooler”. There you can see the connection URL at the top as well as the individual connection parameters below it. It should look something like this:
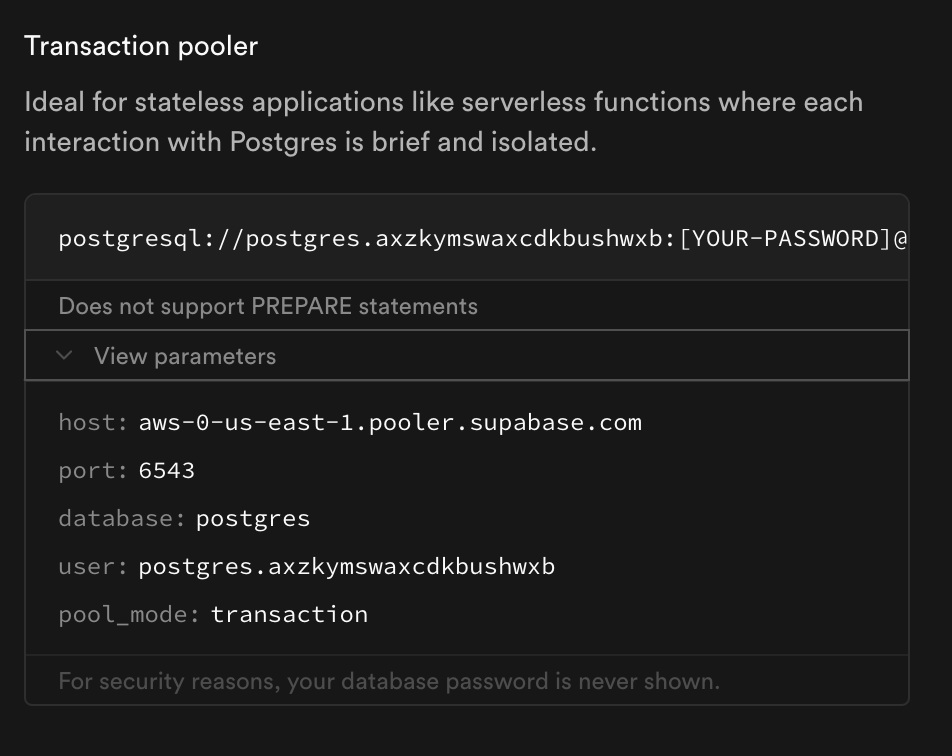
You’ll read the individual connection parameters shown below the URL (host, port, database name, user, password) to configure your database in surveydown.
Storing your database credentials
Before connecting to your database, you need to store your credentials. There are two ways to do this:
Option 1: Interactive setup (recommended)
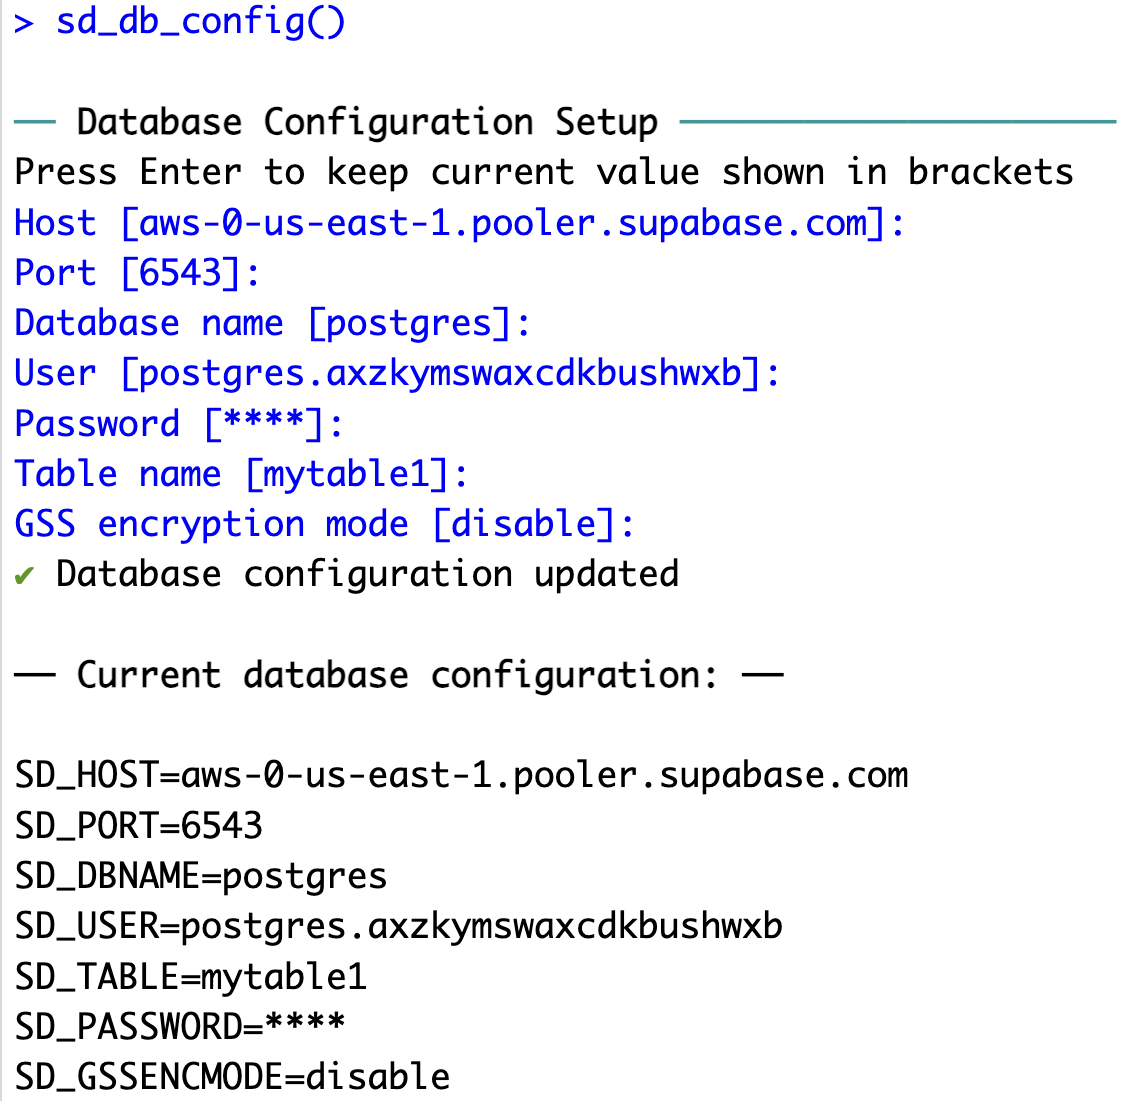
Run sd_db_config() with no arguments:
This will prompt you to enter each database credential one by one — host, port, database name, user, password, and table name — which you can read off the connection parameters shown on the Supabase page. The current values are shown in square brackets; press Enter to keep one (e.g. the default "responses" table name). When done it should look like this:
Option 2: Passing parameters directly
Instead of the interactive prompts, you can pass any of the connection parameters as arguments to sd_db_config():
surveydown::sd_db_config(
  host     = "aws-0-us-east-1.pooler.supabase.com",
  port     = "6543",
  dbname   = "postgres",
  user     = "postgres.xxxx",
  password = "YOUR-PASSWORD",
  table    = "responses"
)
Any parameter you omit keeps its current stored value (or its default), so this also works for changing just one field — see Modifying credentials below.
The .env file
Once you have entered your credentials, the function will store them in a .env file in your project folder. We strongly recommend that you do not manually edit this file or share it with others as it stores all of your database credentials, including your password.
Modifying credentials
If you want to modify your credentials stored in the .env file, you can just run sd_db_config() again and press ‘Enter’ on any parameter you want to leave unchanged while modifying the ones you want to change.
You can also pass any of the parameters as arguments to sd_db_config() to change them. For example, if you wanted to only change the table name, you could do this:
sd_db_config(table = 'mytable')Once run in the R console, a message will print out confirming that the stored table parameter will now be mytable.
You can pass any of the following as arguments to update them: host, dbname, port, user, table, and password.
Finally, you can also view / modify your database credentials using the sdstudio package, a companion GUI package for surveydown surveys. To do this, launch the app by running this command in the R console:
sdstudio::launch()This will open a new browser window where you can navigate to the dashboard for your project. Click on the “Connection Settings” tab to see and edit your database credentials. Once you have made changes, click on the “Test Connection” button to save your updated credentials.
See the Local Dashboard page for more information.
Connecting to the database
Once your credentials are stored in a .env file, add the following to your app.R file in the global scope to connect your survey to the database:
db <- sd_db_connect()This reads your credentials from the .env file. If the connection is successful, a message prints to the console confirming it. The survey mode (database, preview, or local) is controlled via the mode key in your survey.qmd YAML — not by sd_db_connect().
If the database connection fails (e.g. no .env file or incorrect credentials), a red banner appears at the bottom of every survey page. See Trouble connecting? below if this happens unexpectedly.
Note
The ignore = TRUE argument in sd_db_connect() is deprecated. Use mode: preview in your YAML instead.
Table creation and data operations
You never need to manually create a table in the database - it gets automatically created after you first run the survey. After you first set up the config and a .env file is properly created, run your survey locally and click past the first page, then you should see the table get created in the database. You can view it directly on supabase (if you’re using supabase), or you can see the table using the dashboard by running sd_dashboard().
The data gets updated in the database on every page turn (each time you push a next button) and after you close the browser, which is usually at the end of the survey, but just in case you close it early it will write to the database then too. This is why you usually have to click past the first page after initial configuration to see the table in the database.
Trouble connecting?
If you’re having trouble connecting to your database, try these steps:
- Are you certain your password is correct? You can open your .env file in a text reader app or in your IDE to check it.
- Are you certain your credentials are correct? If you run
surveydown::sd_db_config()again in your R console, you can see the current values stored in the[]symbols to check if those are correct. - Consider modifying the
gssencmodeparameter. Take a look here.