db <- sd_database(
  host   = "",
  dbname = "",
  port   = "",
  user   = "",
  table  = "any_name"
)Storing Data
The surveydown package is designed to work with any PostgreSQL database. Since many may not want to create such a database on their own, we recommend using Supabase, which is a free, open-source PostgreSQL database service.
In this guide, we’ll walk you through the steps to set up a Supabase project and connect your surveydown survey to it.
- Create a Supabase account
- Create a Supabase project
- Copy your credentials
Create a Supabase account
Navigate to the Supabase website and create an account. You may use your GitHub account or create a new account using your email.
While creating your account, it’s by default that you will have an organization under your account name. Your projects will be designated to this organization. You can have other organizations based on your need, but let’s just use this default one for now.
Create a Supabase project
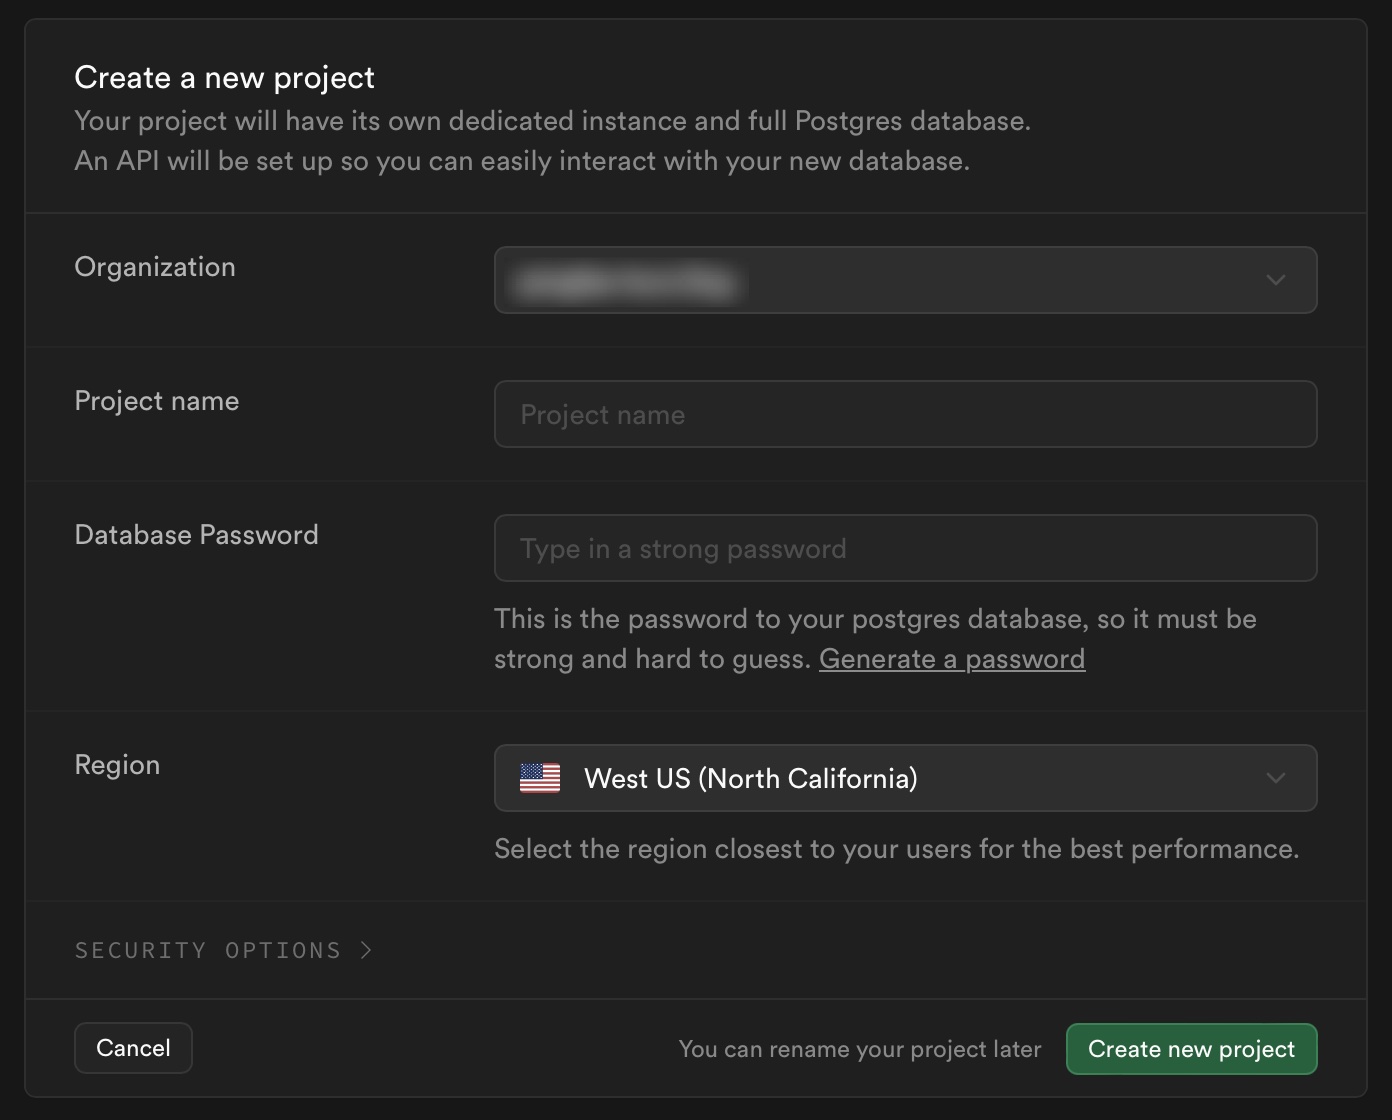
Once you are logged in, the page will prompt you to create a project. It’s an obvious green button. Click on it and select your organization. A dialog box will pop up like this:
Important
One Supabase project can support multiple surveydown surveys if you wish, but we recommend that you have only one survey per project to avoid potential mistakes.
Fill in the project name and give it a strong password. Choose a region that is close to you (or close to your audiences). All settings can be modified at any time.
Important
Once you set the password, don’t forget to also set the same password in surveydown with sd_set_password(). Go to the Password page for details.
You will need this both to communicate with your Supabase project and also to log in to your admin page, should you decide to enable it.
Copy your credentials
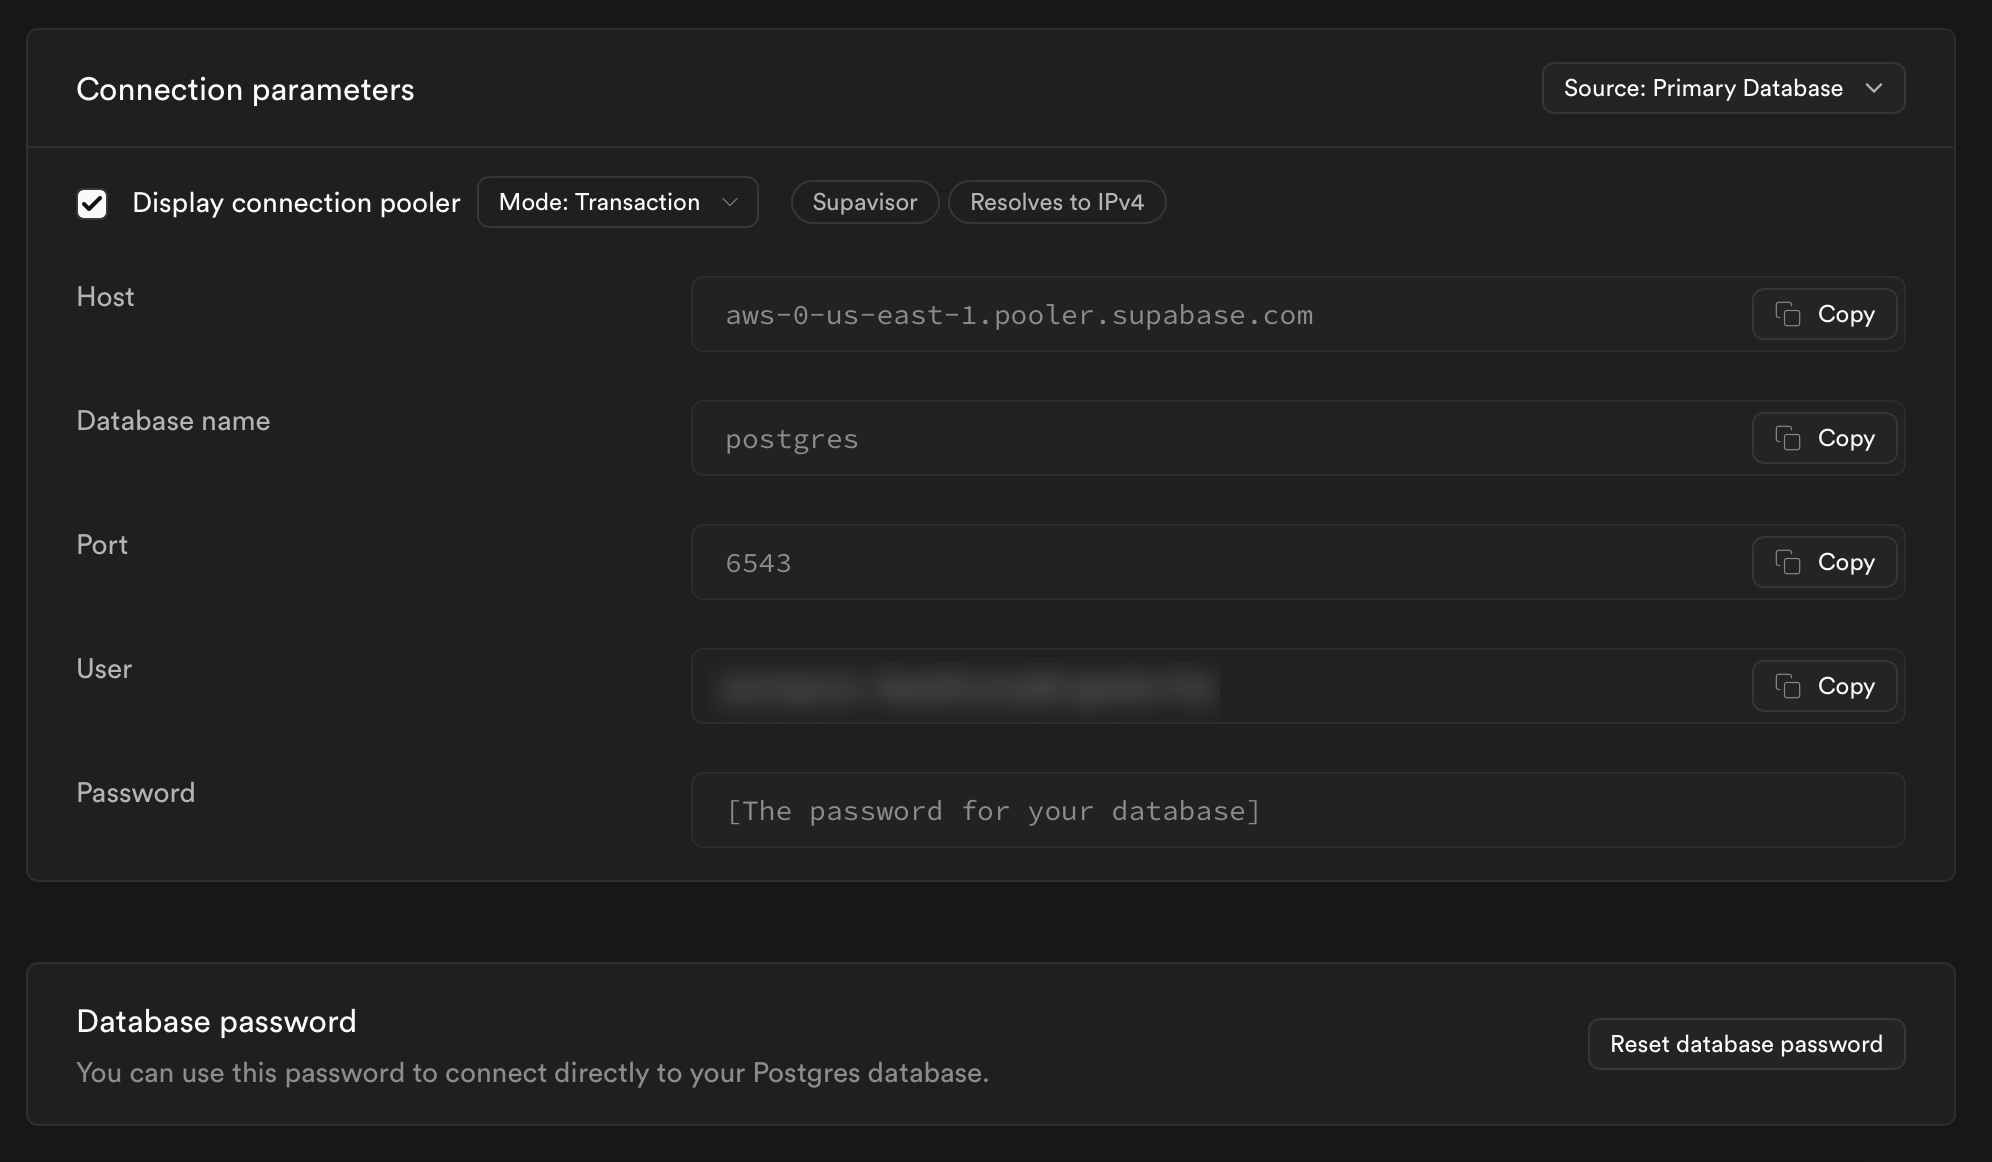
Once your Supabase project is ready, go to “Project Settings” located at the bottom-left corner. Then, click on “Database” under “Configuration”.
You’ll see the “Connection parameters” section like this:
Tip
This is also where you change the password of your Supabase project.
Now, deliver these parameters to your app! In your app.R file, you define sd_database() at the top before defining the server() function. Anything loaded here is globally accessible, so this is where your database configuration should go. In the template it looks like this:
Copy and paste the first 4 parameters from your Supabase page to sd_database(), aka “Host”, “Database name”, “Port”, and “User”. Again, your password should be defined using sd_set_password() in your R console, NOT in the app.R file.
The last parameter, table, can be any string you want. After your survey gets running, a table with this name will appear in “Table Editor” of your Supabase project. It’s located at the top-left corner of the page.
Tips
Ignoring the Supabase connection
While editing your survey, you may want to not connect to the database. This can be easily implemented by setting ignore = TRUE in sd_database():
db <- sd_database(
  # Previous parameters...
  ignore = TRUE
)
With this setting, your connection parameters can remain set, but the survey will not attempt to connect to your database. Instead, a local preview_data.csv file will be created in your project folder so you can preview the survey data.
Disabling gssencmode
If you’ve set everything correctly but still encounter connection error, try to disable gssencmode like this:
db <- sd_database(
  # Previous parameters...
  gssencmode = "disable"
)
By default, gssencmode is set as "prefer". It secures your connection with PostgreSQL, which is the SQL used by Supabase. We generally recommend that you DO NOT disable gssencmode, but sometimes this is necessary, especially when you are working on a protected network, e.g. on a VPN.