sd_question(
  type  = 'mc',
  id    = 'penguins',
  label = "Which is your favorite type of penguin?",
  option = c(
    'Adélie'    = 'adelie',
    'Chinstrap' = 'chinstrap',
    'Gentoo'    = 'gentoo',
    'Other'     = 'other'
  )
)

sd_question(
  type  = "text",
  id    = "penguins_other",
  label = "Please specify the other penguin type:"
)Configuration Options
All survey configuration options are defined with the sd_config() function in the server code chunk.
Conditional display
Basic conditional display
Tip
Use the show_if argument to control basic conditional display logic.
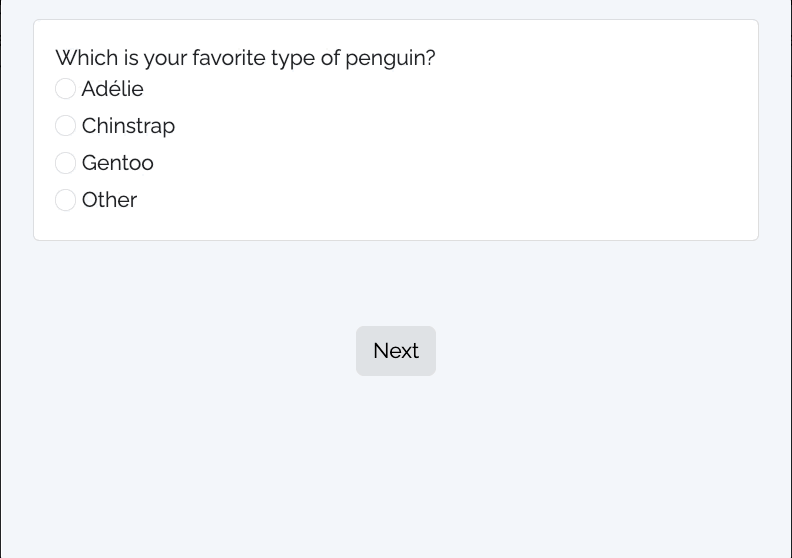
It is often useful to have a question display conditionally based on the value of another question. For example, let’s say we have a multiple choice question about people’s favorite penguin type, and the last option is “other”. If the respondent chose it, you may want a second question to popup that allows them to specify the other penguin type, like this:
To implement this, you first need to define both the triggering question and the target question, like this:
Then in the server code chunk, you can use the show_if argument to define that the penguins_other question would only be shown if the respondent chose the other option in the penguins question, like this:
config <- sd_config(
  show_if = tibble::tribble(
    ~question_id,  ~question_value, ~target,
    "penguins",    "other",         "penguins_other"
  )
)
Here we’re using the tibble::tribble() function (which is like data.frame() but easier to read), to define a data frame with three columns:
question_id: Theidof the triggering question.question_value: The triggering value.target: Theidof the target question to display.
Each row in the data frame defines a condition.
You don’t have to use tibble::tribble(), and in fact if you have a lot of show_if conditions, then you could create a csv file with all of your conditions in it and read it in to set the show_if conditions (just make sure the header has the same three column names), e.g.:
config <- sd_config(
  show_if = readr::read_csv('path/to/show_if_conditions.csv')
)
Custom conditional display
Tip
Use the show_if_custom argument to control custom conditional display logic.
The standard show_if argument is great for simple conditional display logic, but sometimes you need more flexibility. For example, you may want to display a question based on the values of two different questions. In this case, you can use the show_if_custom argument to define a custom function that determines the conditions for displaying a target question.
Using the same example as above, let’s say we only want to display the penguins_other question if the respondent chose the other option in the penguins question and also if they chose show in a second question, show_other:
sd_question(
  type  = 'mc',
  id    = 'show_other',
  label = "Should we show the 'other' option question?",
  option = c(
    'Show' = 'show',
    'Hide' = 'hide'
  )
)
Now we can define a custom function that will check the values of the penguins and show_other questions and return a logical value indicating whether both conditions are met. Then we can use this function in the show_if_custom argument:
show_other <- function(input) {
  return(input$penguins == "other" & input$show_other == "show")
}

config <- sd_config(
  show_if_custom = list(
    list(condition = show_other, target = "penguins_other")
  )
)
Here we provided the show_if_custom argument a list of lists, where each sublist contains a condition and a target. In this example, we just have one condition (the show_other function, which if true will display the penguins_other question), but you can add as many conditions as you want.
If lists of lists are a little confusing, you can also use a tibble::tribble() to define the conditions, like this:
config <- sd_config(
  show_if_custom = tibble::tribble(
    ~condition, ~target,
    show_other, "penguins_other"
  )
)
In this case, each row in the tibble() is a condition with each condition in the condition column and the target question to display in the target column. This layout is sometimes a little easier to read, especially if you have a lot of conditions.
Conditional skipping
Basic skipping
Tip
Use the skip_if argument to control basic skipping logic.
Often times you’ll want to send people to different parts of the survey based on responses to questions. For example, let’s say you want to screen out people who do not own a vehicle. To do this, you would first define a question about their vehicle ownership, e.g.:
sd_question(
  type  = 'mc',
  id    = 'vehicle_ownership',
  label = "Do you own your vehicle?",
  option = c(
    'Yes' = 'yes',
    'No'  = 'no'
  )
)
Then in the server code chunk, you can use the skip_if argument in sd_config() to define the behavior of the next button on the page where you ask this question, like this:
config <- sd_config(
  skip_if = tibble::tribble(
    ~question_id,        ~question_value, ~target,
    "vehicle_ownership", "no",            "screenout"
  )
)
This sets up a condition where the respondent will be sent to a page named screenout if they choose no on the vehicle_ownership question. Notice that again we used tibble::tribble() to define the conditions, just as we did for the show_if argument in basic conditional display, but again you could use a csv file if you have a lot of conditions.
In this example, you could make a screenout page and put it anywhere in your survey after the vehicle_ownership question, something like this:
::: {#screenout .sd-page}

Sorry, but you are not qualified to take our survey.

:::
Notice that we don’t have a sd_next() on this screenout page - that is how you define an end point for the survey taker. If there’s no “Next” button, then they cannot navigate anywhere else, so the survey is over. This is why this screenout page doesn’t necessarily have to be at the end of the survey as the respondent will not be able to navigate anywhere else once reaching this page.
Custom skipping
Tip
Use the skip_if_custom argument to control custom skipping logic.
Similar to the show_if_custom argument, the skip_if_custom argument allows you to define custom skipping logic. This is useful if you need to skip a question based on the values of two or more different questions (or other conditions).
For example, let’s say you want to screen out respondents only if they choose no on the vehicle_ownership question and no on a second question, vehicle_buyer:
sd_question(
  type  = 'mc',
  id    = 'vehicle_buyer',
  label = "Are you looking to buy a vehicle soon?",
  option = c(
    'Yes' = 'yes',
    'No'  = 'no'
  )
)
To implement this, we can define a custom function that will check the values of the vehicle_ownership and vehicle_buyer questions and return a logical value indicating whether both conditions are met. Then we can use this function in the skip_if_custom argument:
screenout <- function(input) {
  return(input$vehicle_ownership == "no" & input$vehicle_buyer == "no")
}

config <- sd_config(
  skip_if_custom = list(
    list(condition = screenout, target = "screenout")
  )
)
Just as with the show_if_custom argument, we provide the skip_if_custom argument a list of lists, where each sublist contains a condition and a target.
If lists of lists are a little confusing, you can also use a tibble::tribble() to define the conditions, like this:
config <- sd_config(
  skip_if_custom = tibble::tribble(
    ~condition, ~target,
    screenout, "screenout"
  )
)
In this case, each row in the tibble() is a condition with each condition in the condition column and the target question to display in the target column. This layout is sometimes a little easier to read, especially if you have a lot of conditions.
Required responses
Tip
Use the required_questions argument to control required responses.
By default, no questions are required. However, you can make questions required by adding the question id to the required_questions argument in sd_config(), like this:
config <- sd_config(
  required_questions = c("vehicle_ownership", "penguins_other")
)
This will make the respondent unable to proceed until they have answered the required questions. It will also place a red asterisk (*) next to the question label to indicate that the question is required.
You can also make all questions required by setting all_questions_required = TRUE like this:
config <- sd_config(
  all_questions_required = TRUE
)
Starting page
Tip
Use the start_page argument to control the starting page.
When editing your survey, it can be helpful to start the survey at a specific page. You can define the starting page by setting the start_page argument to a page id in the sd_config() function, like this:
config <- sd_config(
  start_page = "page_id"
)
Show all pages
Tip
Use the show_all_pages argument to show al pages at once.
By setting show_all_pages = TRUE in the sd_config() function, all pages will be shown when the survey loads. This can be helpful for quickly previewing the survey content and / or printing out the entire survey as a PDF.
config <- sd_config(
  show_all_pages = TRUE
)
Admin page
Tip
Use the admin_page argument to control whether the admin page is created.
Important
The admin page is currently under development and has limited functionality.
By default, the admin page is not created. But if you want one, set admin_page to TRUE inside the sd_config() function, like this:
config <- sd_config(
  admin_page = TRUE
)
When the admin page is enabled, you will be able to access the page by adding ?admin to the end of the survey URL, e.g. https://myname.shinyapps.io/?admin. This will display a login page with a single “Password” parameter, which is the password set using sd_set_password(). See the Password page for details.
The admin page has the following features:
- Pause Survey: Once clicked, the Shiny app pauses all instances replacing questions with a placeholder page.
- Pause DB: Once clicked, the all database uploads will be paused. You can still take the survey, but the data will not be updated in the database.
- Download Data: Download the most recent table instance from the database as a .csv file.
- Admin Logout and Return to Survey: Once clicked, the admin page will be logged out and the survey will be returned to the start page.
- Survey Data Preview: View the latest instance of the database table.